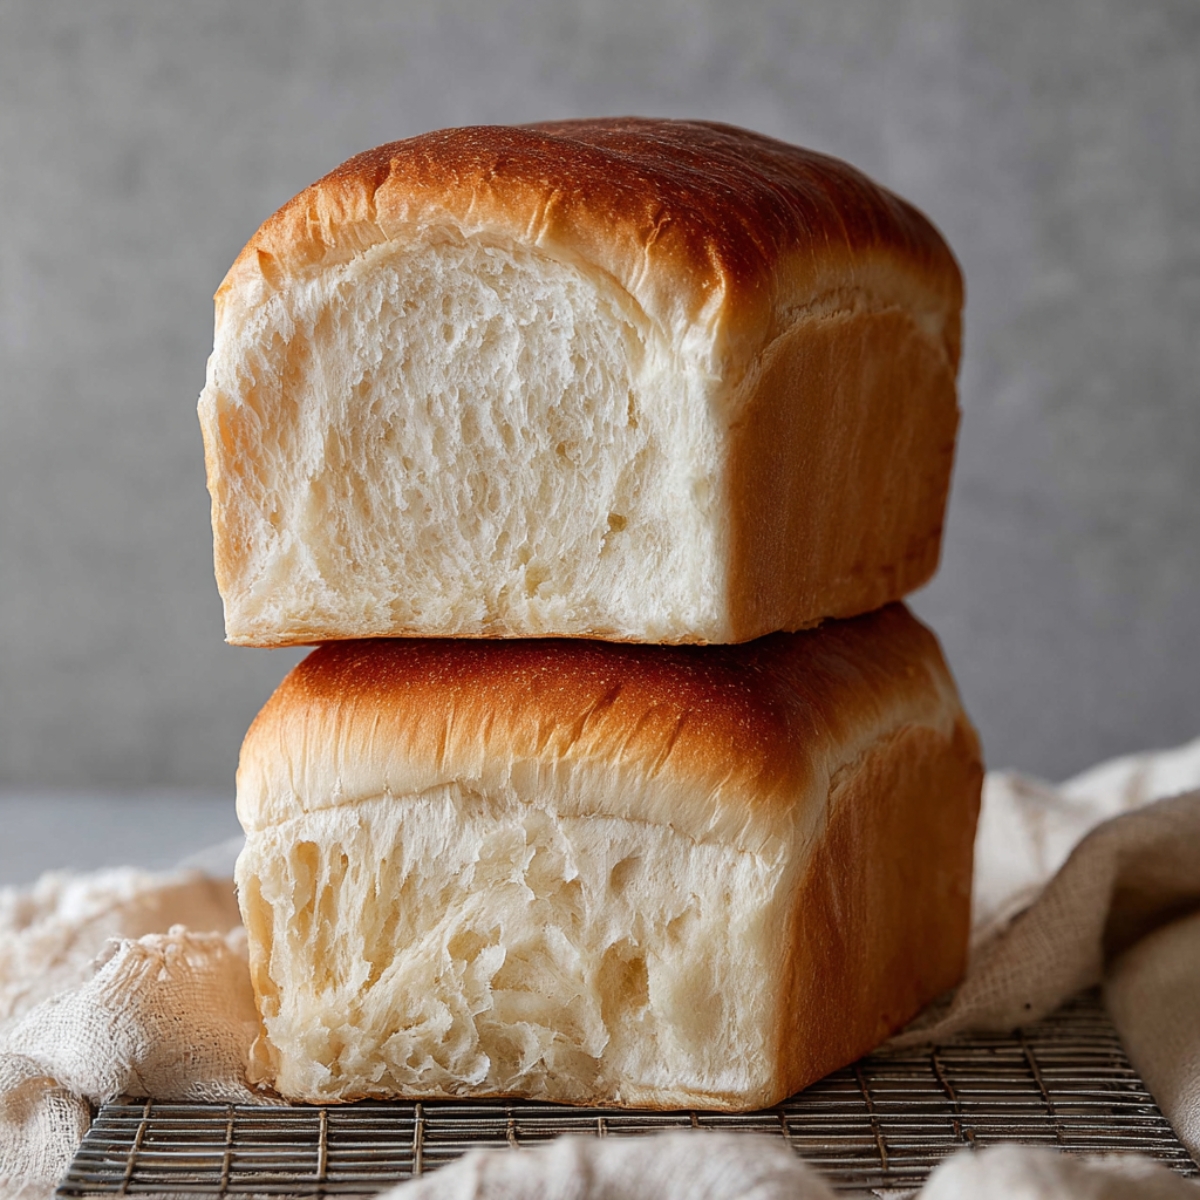
This Easy Milk Bread Loaf is the kind of bread that makes your whole kitchen smell like a bakery. The texture is unbelievably soft, almost feathery, and it holds together beautifully whether you're layering it for a sandwich or just tearing off a warm piece straight from the loaf.
I first made this milk bread on a slow Saturday morning when I had a few hours to spare and a serious craving for something homemade and comforting. What surprised me most was how straightforward the process is - no complicated techniques, no special starters, just simple pantry ingredients and a little patience
If you love warm, bakery-style bread at home, you might also enjoy my Fluffy Japanese Soufflé Pancakes for a soft and sweet breakfast treat, or pair a slice with Super Quick Avocado Toast with Hard Boiled Egg for an easy morning plate. And if you're into cozy breakfast spreads, my Raspberry Chia Pudding, Belgian Waffle, and Turkey Sausage Recipe are all perfect alongside a thick slice of this loaf.
Why You'll Love This Milk Bread Loaf
This milk bread recipe is the kind of thing you make once and it becomes a regular in your rotation. The crumb is soft and pulls apart in those satisfying layers. The flavor is gently sweet and buttery without being heavy. It toasts beautifully, holds sandwich fillings without falling apart, and tastes just as good on day two with a spread of jam or honey.
There's no tangzhong to prep, no complicated shaping techniques to master, and the ingredients are things you likely already have on hand. The dough is forgiving, the process is logical step by step, and the result looks like something from a proper bakery. You also get a full loaf of twelve generous slices, which in this house disappears faster than I expect every single time.
Jump to:
Ingredients You'll Need
Here's everything that goes into this milk bread loaf, with a quick note on why each one matters:
Bread flour (500 g / 3¾ cups): Bread flour has more protein than all-purpose flour, which builds stronger gluten. That's what gives milk bread its stretchy, soft structure and that lovely chew.
Sugar (40 g / 3 tbsp): A small amount of sugar feeds the yeast and adds the subtle sweetness that makes milk bread taste different from plain white bread.
Instant yeast (1½ tsp): Instant yeast goes straight into the dough without proofing first. It gives the bread its rise and that light, open crumb.
Cold water (225 g / a little less than 1 cup): Using cold water slows down the yeast slightly and gives the gluten more time to develop, which improves the final texture.
Cold milk (115 g / ½ cup): Milk adds fat and protein to the dough, which tenderizes the crumb and gives milk bread its signature soft, pillowy texture.
Sea salt (9 g / 1½ tsp): Salt controls yeast activity, strengthens gluten, and sharpens every other flavor in the loaf.
Unsalted butter (25 g / 1¾ tbsp), cut into small cubes: Butter adds richness and creates that melt-in-your-mouth tenderness. Starting with room-temperature butter after the autolyse helps it incorporate smoothly into the dough.
Butter and flour for the pan: Greasing and flouring the loaf pan helps the bread release cleanly after baking. A little extra butter brushed on top after baking gives the crust a beautiful sheen.
See recipe card for quantities.
How to Make This Easy Milk Bread Loaf
Here's a warm, clear walkthrough from start to finish:
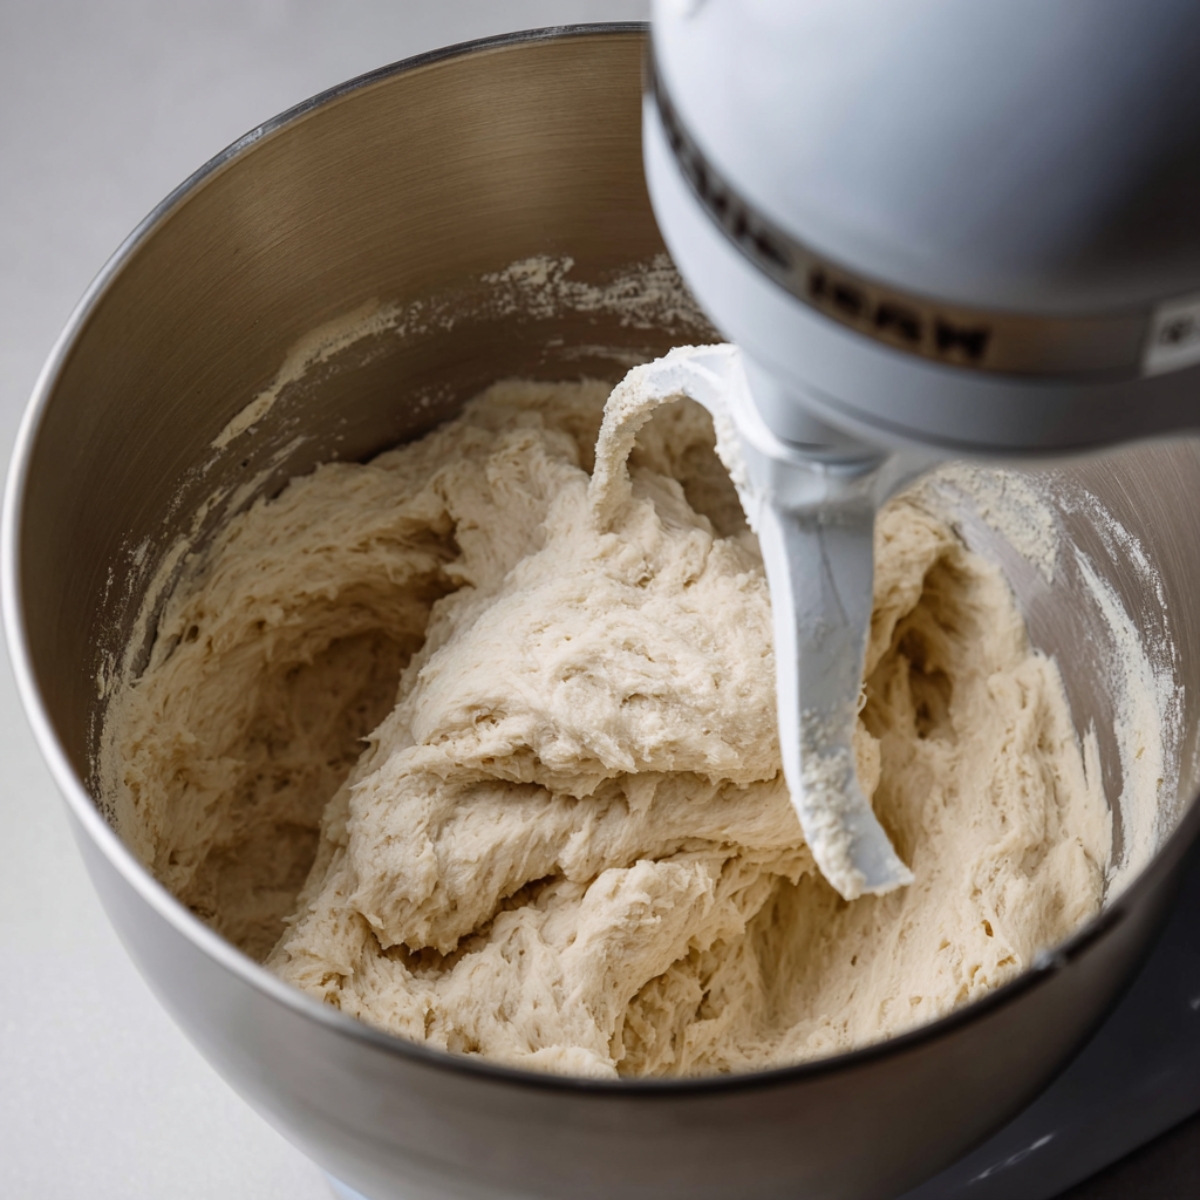
Make the dough: In your stand mixer bowl, combine the bread flour, sugar, instant yeast, cold water, and cold milk. Knead on low speed until a rough, shaggy dough comes together. It won't look smooth yet and that's completely fine.
Autolyse rest: Cover the bowl and let the dough rest for 30 minutes. This rest period lets the gluten relax and develop on its own without kneading, which improves the texture significantly. While you wait, take your butter out of the fridge so it can soften.
Add salt and knead: Add the sea salt to the rested dough and knead on low speed for 1 minute. You'll notice the dough starting to feel more cohesive.
Incorporate the butter: Add the softened butter cubes a few pieces at a time and continue kneading. Keep going until the dough passes the windowpane test - you should be able to stretch a small piece thin enough to see light through without it tearing. This takes about 6 minutes on low speed and 1 minute on medium. The dough should be smooth, slightly tacky, and elastic.
First proof: Shape the dough into a smooth ball and place it in a lightly greased bowl. Cover with plastic wrap or a damp towel and let it rise somewhere warm, between 82 and 90°F (28 to 32°C), for about 1 hour, or until it's almost doubled in size.
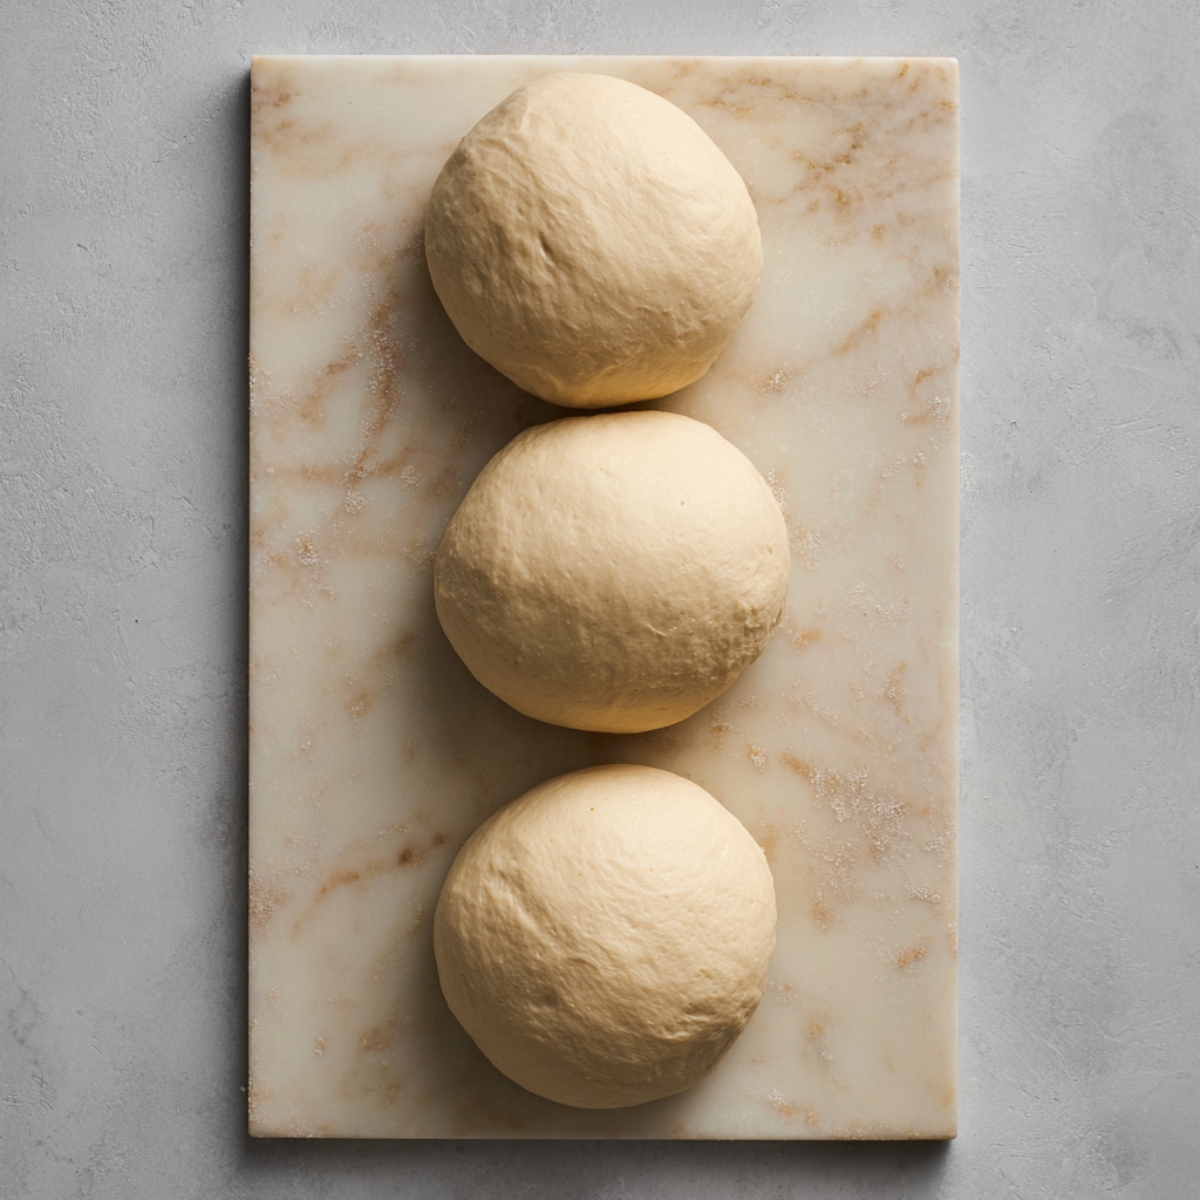
Divide and pre-shape: Transfer the dough to a clean surface. Cut it into 3 equal pieces - cut cleanly, don't pull or tear. Shape each piece gently into a ball. Cover and let them rest for 15 minutes.
First roll: Take one dough ball and use a rolling pin to flatten it into an oval shape. Starting from the edge closest to you, roll it up into a log, like a small jelly roll. Repeat with the remaining two pieces. Cover and rest for another 15 minutes.
Final shape: Rotate each log 90 degrees. Roll it out again into a rectangle, then roll it back up into a tight log. This double-roll technique creates layers in the crumb that make the milk bread pull apart in those satisfying ribbons.
Pan and second proof: Grease your loaf pan well with butter and dust lightly with flour. Place the three shaped logs side by side in the pan. Cover loosely and let rise until the dough reaches 80 to 90 percent of the pan's height, about 1 to 1.5 hours.
Preheat the oven: In the last 20 minutes of proofing, preheat your oven to 375°F (190°C). Position your oven rack one-third up from the bottom.
Bake: Slide the loaf in and bake uncovered for 30 to 35 minutes. The top should be a deep golden brown and the loaf should sound hollow when you tap the bottom. After baking, loosely lay a piece of foil over the top and let it rest for 15 minutes - this prevents over-browning and helps the crust stay soft.
Cool and finish: Remove the loaf from the pan and gently drop it from about 2 inches onto the counter. This small step helps prevent the bread from shrinking as it cools. Transfer to a cooling rack, brush the top generously with melted butter, and let it rest for at least 15 minutes before slicing.
Substitutions and Swaps
Bread flour: You can use all-purpose flour in a pinch, but the texture will be slightly less chewy and the structure a little softer. Bread flour really is worth it here.
Whole milk: Whole milk gives the best flavor and tenderness, but 2% milk works well too. Plant-based milks like oat milk can be used, though the flavor will be a bit different.
Unsalted butter: If you only have salted butter, reduce the added salt slightly. The flavor will be close.
Instant yeast: Active dry yeast can be used instead - just proof it first in a small amount of warm water with a pinch of sugar until foamy before adding to the dough.
Equipment
Stand mixer with a dough hook
Loaf pan (10 x 5 x 3 inches)
Rolling pin
Cooling rack
Plastic wrap or a damp dish tow
Storage Tips
Room temperature: Wrap the cooled loaf tightly in plastic wrap or store in a zip-top bag. It stays soft and fresh for 2 to 3 days at room temperature.
Freezing: Slice the loaf first, then freeze slices in a single layer before transferring to a freezer bag. Pull out individual slices as needed and toast directly from frozen. It keeps well for up to 2 months.
Refreshing: Day-old milk bread is wonderful lightly toasted - the warmth brings the softness right back.
Expert Tips for the Best Milk Bread
Don't skip the autolyse. That 30-minute rest before adding the salt and butter does more for your dough than extra kneading. It builds gluten quietly while you go do something else.
Windowpane test matters. Don't guess at whether the gluten is developed enough. Take a small piece and stretch it gently. If it stretches thin and translucent without tearing, you're ready.
Cold ingredients are intentional. Cold water and cold milk slow the fermentation just enough to let the gluten develop properly. Don't be tempted to use warm liquids.
The drop step is important. Dropping the bread from 2 inches right after baking might feel counterintuitive, but it releases steam and prevents the loaf from collapsing as it cools.
Brush butter while warm. The warm bread soaks up the melted butter in the best way and gives the crust that gorgeous, slightly glossy finish.
FAQ
What is a milk loaf of bread?
A milk loaf is a soft, lightly sweetened white bread made with milk as a key ingredient. The milk gives the crumb a tender, pillowy quality that's softer and richer than a basic water-based white bread. It's popular across Asian bakeries and home kitchens alike for its incredibly soft texture.
What exactly is milk bread?
Milk bread is a style of soft white bread with roots in Japanese and broader Asian bakery traditions. It's made with milk and butter for a tender, fluffy crumb and a subtle sweetness. This milk bread loaf skips the tangzhong starter method but still delivers that signature pillowy texture through the autolyse step and cold-water dough technique.
Is milk bread healthy or unhealthy?
Milk bread is a white bread made with refined flour, so it's not a high-fiber choice. That said, it does contain some protein from the bread flour and milk, and the fat content is relatively modest compared to enriched breads like brioche. Enjoyed in moderation as part of a balanced diet, a slice or two of homemade milk bread is a perfectly reasonable treat. Tip: pair it with eggs or a protein-rich topping to make it a more filling meal.
Related
Looking for other recipes like this? Try these:


Pairing
These are my favorite dishes to serve with [this recipe]:


Soft Milk Bread Loaf
Ingredients
Equipment
Method
- Combine flour, sugar, yeast, water, and milk in a mixer and knead on low until a rough dough comes together.
- Cover the bowl and allow the dough to rest for 30 minutes while the butter softens at room temperature.
- Add salt and knead briefly before incorporating the butter pieces, then continue mixing until the dough becomes smooth and stretchy.
- Shape the dough into a round and place it in a greased bowl, cover, and let it rise until nearly doubled in size.
- Transfer the dough to a work surface, divide into three equal portions, shape into balls, and let them rest covered.
- Roll each piece into an oval, then roll into logs, let them rest again, then repeat the rolling process for a tighter structure.
- Arrange the rolled pieces into a greased and floured loaf pan, cover, and allow them to rise until they nearly fill the pan.
- Preheat the oven near the end of proofing, then bake the loaf until golden, covering loosely with foil midway to prevent over-browning.
- Remove the bread immediately from the pan, lightly tap the pan once, brush the top with melted butter, and cool before slicing.


Leave a Reply