If you've ever pulled a warm loaf out of the oven and felt like you'd done something truly special, that's exactly what Dutch oven bread gives you every single time. Big, golden, crackling crust on the outside, soft and pillowy on the inside, and made with just a handful of pantry staples you probably already have. I started baking this after my neighbor Chloe showed up at my door one afternoon with a warm loaf wrapped in a kitchen towel, and I stood there in my doorway just completely floored that she'd made it herself. What I love most is how simple it actually is. No fancy equipment, no bread machine, no complicated techniques.
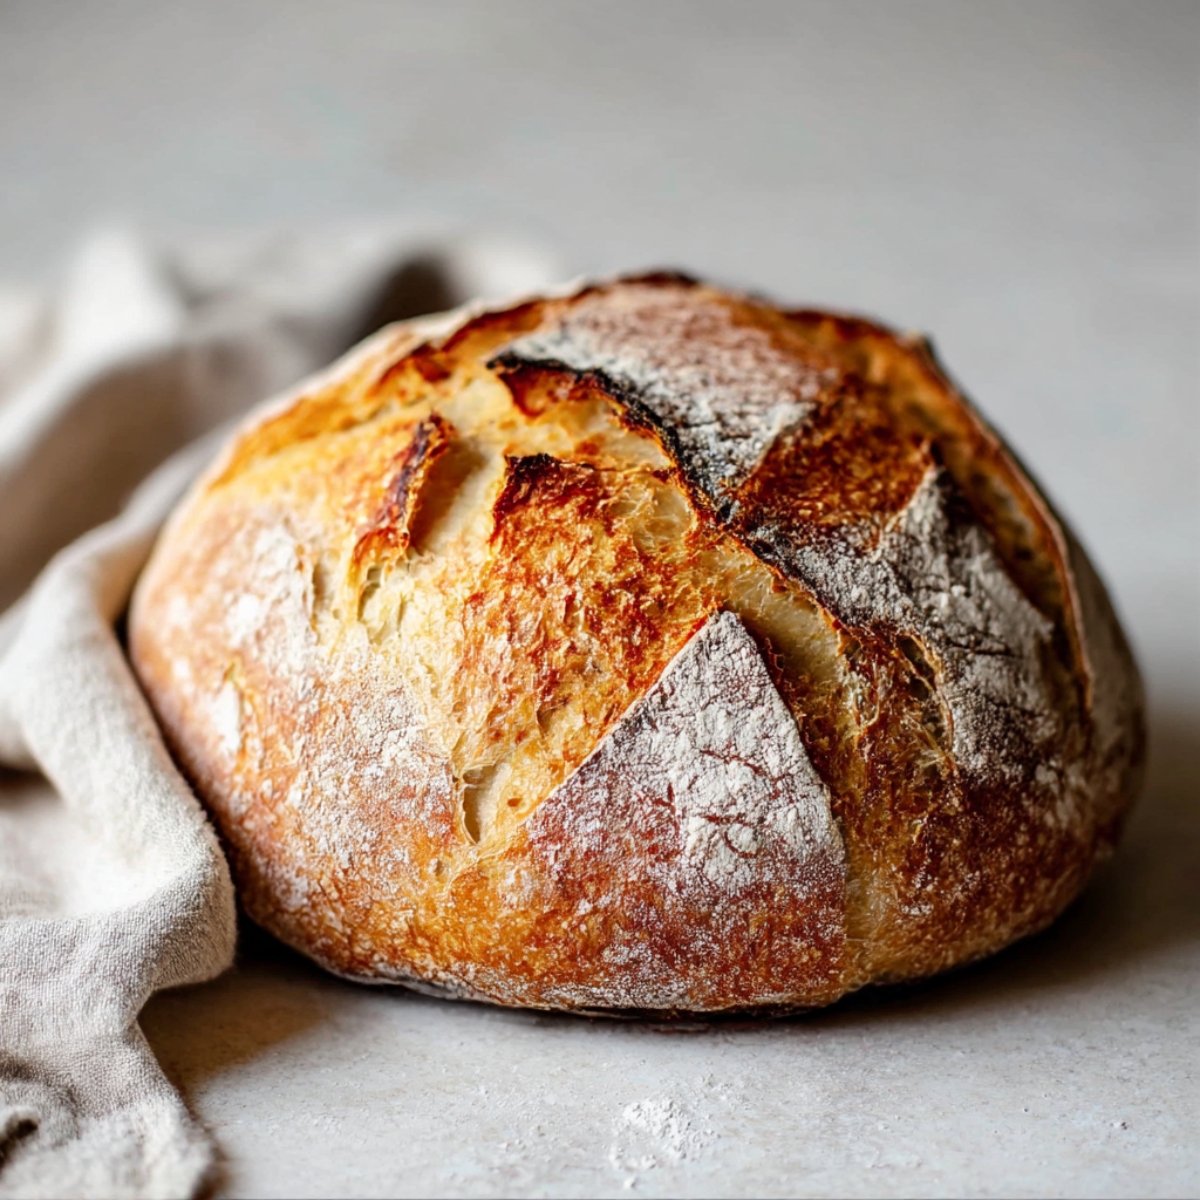
Just a bowl, some flour, and a good Dutch oven, and you're already halfway there.
And if you're the kind of person who loves a cozy homemade breakfast spread, this bread fits right in alongside some Crispy Apple Fritters or a slice of warm Sausage French Toast Roll Ups fresh off the pan. On lazy weekend mornings, I'll put a loaf of this in the oven and whip up a Cottage Cheese Egg Bake at the same time, and honestly it feels like a little celebration. If you've got a sweet tooth, try pairing a thick slice with some Easy One Hour Cinnamon Rolls or go all out and make Amazing Vanilla French Beignets for Breakfast on the side. It all just works together in that warm, unhurried, everybody's-still-in-pajamas kind of way.
Why You'll Love This Dutch Oven Bread
This is the kind of dutch oven bread recipe that earns a permanent spot in your rotation. Here's why it works so well:
It comes together with just six simple ingredients, most of which are already in your pantry. The Dutch oven does all the heavy lifting when it comes to creating that gorgeous crust. There's no special bread-baking knowledge required, so if you're a beginner, this is genuinely one of the best places to start. The loaf is versatile enough to go alongside soups, stews, sandwiches, or just eaten plain with a little butter.
Jump to:
Ingredients for Dutch Oven Bread
Here's everything you need to make this dutch oven bread , plus a quick note on what each ingredient actually does.
Strong white bread flour: Forms the structure of the bread and gives it that satisfying chew. The higher protein content in bread flour is what makes the crumb stretchy and light rather than dense.
Salt: Balances the flavor and strengthens the gluten structure. Don't skip it and don't add it right on top of the yeast before mixing.
Active dried yeast: This is what makes the dough rise. One standard packet gives you the perfect lift for this size loaf.
Warm water (around 40°C / 104°F): Activates the yeast without killing it. Too cold and it won't wake up, too hot and you'll damage it. Aim for the temperature of a warm bath.
Honey: Feeds the yeast and adds a very gentle, natural sweetness to the finished loaf. It also helps the crust brown beautifully.
Extra flour for dusting: Keeps the dough from sticking to your surface while you shape it. Just use it lightly.
See recipe card for quantities.
Instructions for Dutch Oven Bread
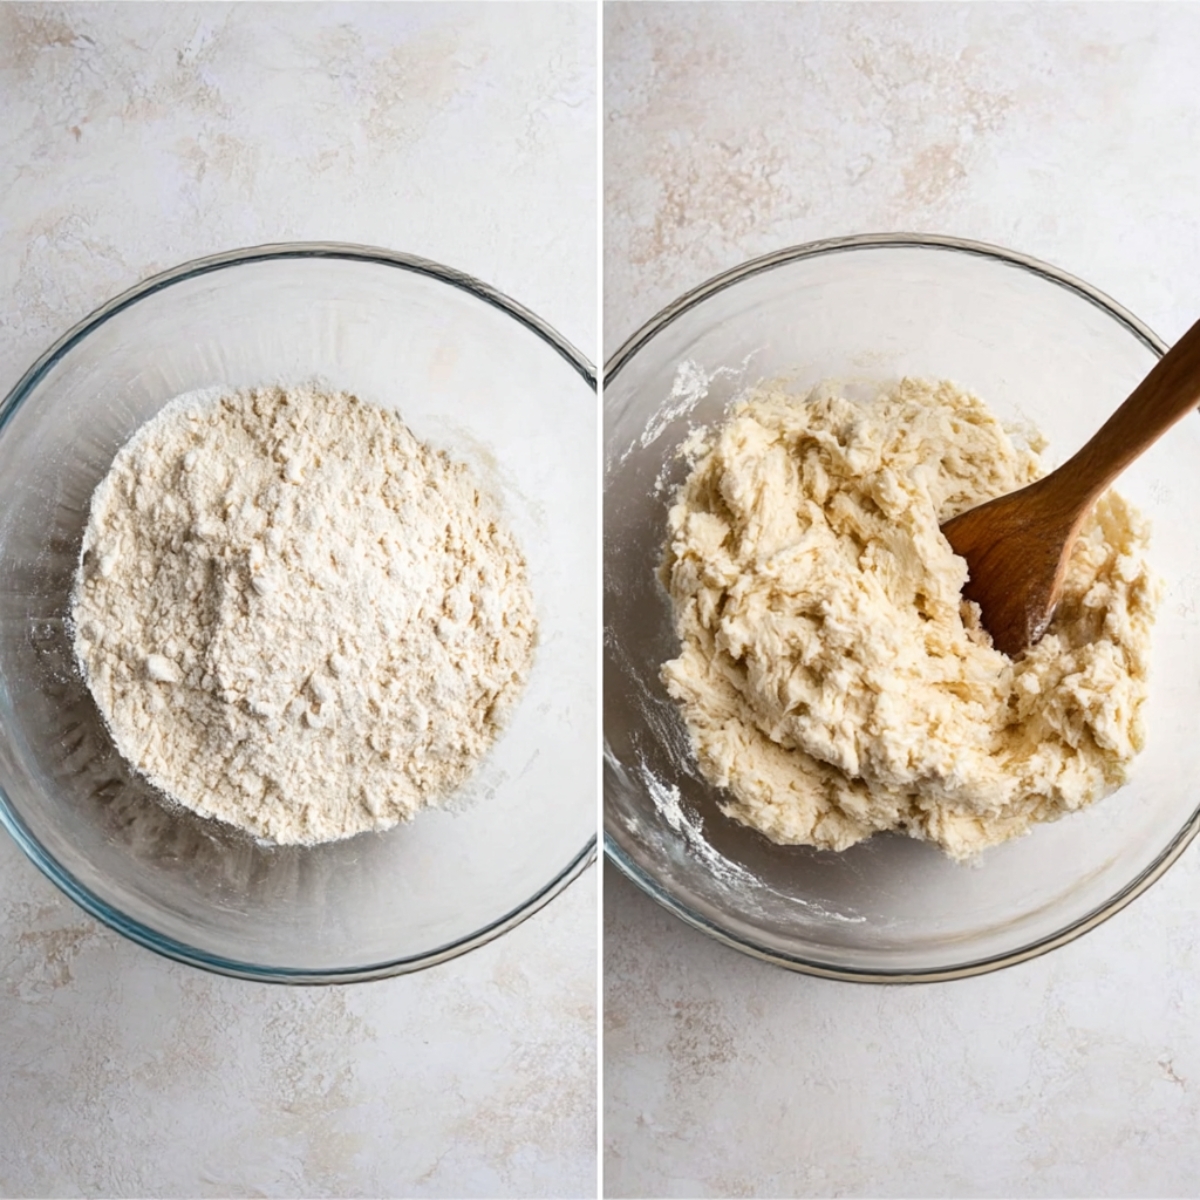
Mix the dough: In a large mixing bowl, combine 500 g of strong white bread flour, 1½ teaspoons of salt, and 7 g of active dried yeast. In a separate jug, stir together 350 ml of warm water and 1 tablespoon of honey until the honey dissolves. Pour the liquid into the dry ingredients and mix with a wooden spoon or your hands until a rough, shaggy dough forms. It won't look pretty yet, and that's completely fine.
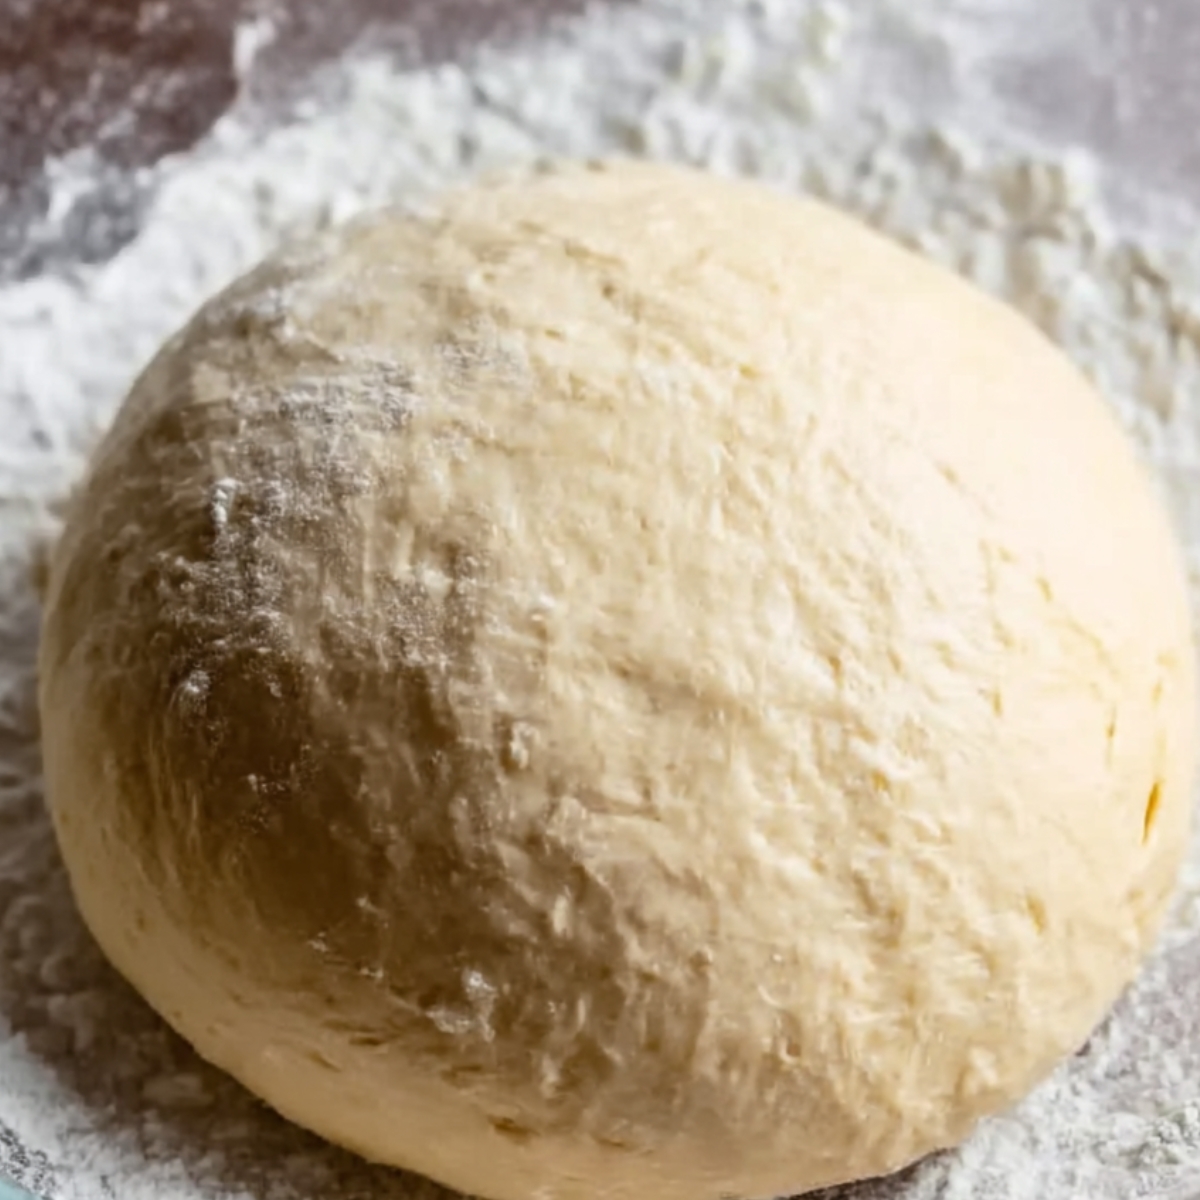
Knead the dough: Turn the dough out onto a lightly floured surface and knead for 10 minutes until it becomes smooth and elastic. You'll know it's ready when it springs back slightly when you poke it. This step builds the gluten that gives your Dutch oven bread its chewy, airy texture.
First rise: Place the dough in a clean, lightly oiled bowl and cover it with a damp tea towel or plastic wrap. Set it somewhere warm and let it rise for 1 to 1½ hours, or until it has doubled in size. A turned-off oven with just the light on works great for this.
Shape the dough: Once risen, punch the dough down gently to release the air. Turn it onto a floured surface and fold the edges into the center, then flip it seam-side down to form a tight round ball. Place it onto a piece of baking parchment.
Second rise: Loosely cover the dough with a tea towel and let it puff up again for 30 to 45 minutes. While it rests, preheat your oven to 220°C (200°C fan) / 425°F and place your Dutch oven with the lid on inside to heat up. Getting the pot hot before the bread goes in is key for that crackling crust.
Bake: Carefully pull the Dutch oven out of the oven and lift the dough in using the parchment paper as a sling. Put the lid on and bake for 25 minutes. Then remove the lid and bake for another 15 to 20 minutes until the crust is a deep golden brown. Tap the bottom of the loaf and if it sounds hollow, it's done.
Cool: Transfer the bread to a wire rack and let it cool for at least 30 minutes before slicing. I know it's hard to wait, but cutting into it too soon makes the inside gummy.
Substitutions and Swaps
No bread flour? All-purpose flour works, though the crumb will be slightly less chewy and a little more tender.
No honey? A teaspoon of white sugar or maple syrup will activate the yeast just as well.
No active dried yeast? Instant yeast works at the same amount. You can skip dissolving it in the water first and just mix everything together straight away.
Want a whole wheat loaf? Swap up to half the bread flour for whole wheat flour. The loaf will be denser but still delicious.
Equipment for Dutch Oven Bread
A large mixing bowl, a measuring jug, a wooden spoon or your hands for mixing, a lightly floured surface, a tea towel or plastic wrap, a Dutch oven with a lid, baking parchment, and a wire rack for cooling. That's genuinely it.
Storage Tips for Dutch Oven Bread
Once your Dutch oven bread has fully cooled, wrap it in a clean tea towel or store it in a bread bag at room temperature. It keeps well for up to 3 days. For longer storage, slice the loaf and freeze it in a zip-lock bag for up to 3 months. Toast slices straight from frozen and they come out beautifully.
Expert Tips for the Best Dutch Oven Bread
Use a kitchen thermometer to check your water temperature. Getting it right makes a real difference in how well the yeast activates.
Don't rush the rises. The longer the dough rests, the more flavor it develops. If you want an even deeper flavor, you can let the dough do its first rise overnight in the fridge.
Always preheat your Dutch oven. Putting the dough into a cold pot will give you a much softer crust.
Score the top of the dough with a sharp knife or bread lame just before baking. This gives the bread a place to expand and creates that gorgeous cracked top you see on bakery loaves.
If the bottom is browning too quickly, place a baking sheet on the rack below to deflect some of the heat.
FAQ for the Best Dutch Oven Bread
What do Dutch ovens do for bread?
A Dutch oven bread traps the steam released by the dough during baking, which is what creates that signature crackly, golden crust. It replicates the steam-injection ovens used in professional bakeries, just in your home kitchen. That's why Dutch oven bread has such a professional look and texture compared to a loaf baked on an open tray.
What are the 4 ingredients in bread?
Traditional bread is made from flour, water, yeast, and salt. This Dutch oven bread recipe follows that same base and adds a little honey for flavor and to help the yeast activate. It's still one of the simplest ingredient lists you'll find.
Is a bread oven better than a Dutch oven?
A dedicated bread oven does give you more control over steam and temperature, but a Dutch oven comes impressively close for home baking. For most home cooks, a good cast iron Dutch oven produces results that are honestly hard to tell apart from a professional setup. It's a very worthwhile tool.
Is a Dutch oven for sourdough?
Yes, a Dutch oven works beautifully for sourdough too. The same steam-trapping method that makes this simple Dutch oven bread recipe work so well also applies to sourdough loaves. Many sourdough bakers consider it the best way to bake at home.
Related
Looking for other recipes like this? Try these:


Pairing
These are my favorite dishes to serve with [this recipe]:


Crusty Dutch Oven Bread
Ingredients
Equipment
Method
- In a large mixing bowl, whisk together the flour, salt, and yeast.
- In a separate jug, combine the warm water and honey, stirring until the honey is dissolved.
- Make a well in the center of the dry ingredients, then pour the water-honey mixture into the well. Mix with a wooden spoon or your hands until a rough, shaggy dough forms.
- Transfer the dough to a generously floured surface and knead for 10 minutes until smooth and elastic. It should spring back slightly when pressed.
- Place the dough in a lightly oiled bowl, cover with a damp towel, and let it rise in a warm place for 1 to 1½ hours, until doubled in size.
- Preheat the oven to 220°C (425°F) and place your Dutch oven (with its lid) inside to heat up.
- Once the dough has risen, punch it down to release the air. Shape it into a round ball, with the seam side facing down. Shape the dough and place it onto a piece of parchment paper.
- Cover the dough loosely with a tea towel and let it rise again for 30–45 minutes. Meanwhile, ensure the Dutch oven is hot.
- Carefully remove the hot Dutch oven from the oven. Lift the dough using the parchment paper and transfer it to the pot. Cover with the lid and bake for 25 minutes.
- After 25 minutes, remove the lid and continue baking for 15–20 more minutes, or until the bread’s crust is golden brown and it sounds hollow when tapped.
- Carefully lift the bread from the Dutch oven using the edges of the parchment paper and place it on a wire rack. Let it cool for at least 30 minutes before slicing.


Leave a Reply